
 Sometimes I dream about the iced sugar cookies from Sam Mazza's. And by sometimes I mean on almost a weekly basis. I spent a good part of my childhood believing some variation of a cookie fairy delivered these to my Grandma's house like clockwork every time we visited. I'm now an adult who could probably just, I don’t know, just go to Sam Mazza's and buy some cookies, but I think a small part of me doesn't want to kill the magic (or drive the 4+ hours to Burlington, VT). However, that won't stop me from trying to recreate the magic myself. The truly magical part of these cookies, or at least the part that has cemented itself in my food memory, is the icing. It was always the perfect thickness – not visibly clunky but substantial enough that it snapped satisfactorily between your teeth. The best cookies in the box were those that fell subject to immense drips of icing sliding haphazardly off their sides. After many trials and tribulations, I think I’m almost there with this recipe. I’ve adult-ed my childhood favorite up a few notches by making the base sugar cookie into a delicate marzipan riff. I’ve including instructions on how to relegate your icing tidily into a border and even add some décor with the leftover marzipan and a simple round tipped piping bag. If you want to recreate the classic cookie though, just pour that icing all over your cookies and let it ooze gloriously down the sides (I’d recommend doing this over parchment paper for easier cookie extraction). A couple of notes on icing. I tried a few attempts where I mixed up a thick border icing and a thin flood icing and have found this to be a bit more trouble than its worth. As long as your icing is the right gooey consistency, you should be able to do the border and flood with the same batch as you move along. I found that this gives you a much smoother texture and reduces a lot of the work. The photos accompanying this blog post are an example of one of my earlier frosting tests and you can see where the border meets the flood (not cute) – the recipe below is simplified and will work like a charm.  Shaping some bby hearts. 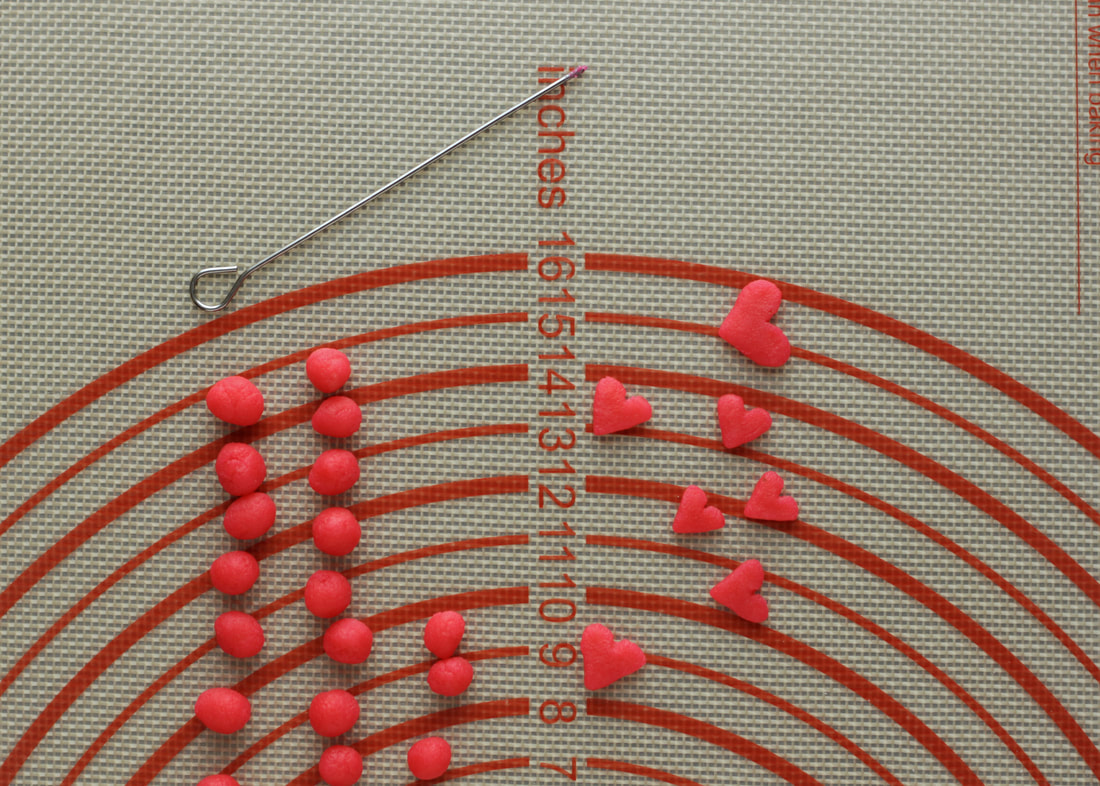 Decorating tip! Most marzipan at the store comes in 7 oz. packages – the leftovers from the recipe make either a delicious snack, or cute decorations. Marzipan can be easily tinted with a small dab of gel food coloring that you work into it with your fingers like play dough. The hearts I used to decorate these cookies are easily made by rolling out small pea sized balls, shaping those into flat triangles, and pressing in the center of one edge as pictured above. Marzipan Cookies with IcingServes: roughly 2 dozen cookies, depending on cookie cutter used
Total time: 3-4 hours (+24 setting time) Source: Adapted from Sally’s Baking Addiction 3/4 cup unsalted butter In a stand mixer or with a hand mixer, cream together the butter and marzipan. Add the sugar and beat until the mixture is light and fluffy (you’ll likely still have some marzipan lumps). Add the egg, vanilla, and almond extract and beat on high for two minutes to combine. In a separate bowl, whisk together the flour, baking powder, and salt. With the mixer on low, add half of the flour mixture until just combined and then add the other half of the flour mixture until combined.
Divide the dough into two even pieces and gently roll each of the pieces out on parchment paper to about ¼ inch thick. It’s going to be a little sticky and weird looking – but trust me it’s easier than muscling cold dough out into an even thickness. Put the rolled out dough in the refrigerator separated by parchment paper and chill for at least an hour (you can speed up the process by popping it in the freezer for 20 minutes). While the cookie dough is chilling, preheat the oven to 350°F and line two baking sheets with parchment paper. Remove one sheet of the dough from the refrigerator and cut out your desired shapes with a cookie cutter. Place the shapes on the baking sheets and bake in the oven for 10-12 minutes, one sheet at a time. Depending on your cookie shape, they may need a few more minutes in the oven – the cookies should be just barely cooked all the way and not yet browning around the edges. Cool the cookies completely before moving on to icing. While the cookies are cooling, it’s time to make the icing. Sift all of the confectioners sugar into a large bowl. Add the corn syrup, water, vanilla extract, and food coloring (if using). Whisk everything together until the icing slides off the whisk in slow gentle ribbons. If the icing is too thick and is breaking instead of ribboning – add water a tablespoon at a time until it’s right. If this icing is running so quickly off the whisk that it will slide right off the cookies when you ice them, add confectioners sugar a tablespoon at a time until it’s right. When you’re satisfied with your icing, place it in a piping bag fitted with a small round piping tip (I used the Wilton #5 tip). You can also just snip off a little bit of the end of the piping bag. Now, with a cookie in hand, pipe a border about ¼ inch from the edge of the cookie and then “flood” the interior with parallel lines back and forth. You can use a toothpick or other small pointy instrument to nudge gaps in the icing together. As the cookie sits, some of the gaps may naturally close. If you made any marzipan decorations – now is the time to plop those cuties on top while the icing is still wet, sprinkles also work great here too. Let the cookies dry for 24 hours to achieve ultimate icing crunch.
0 Comments
Leave a Reply. |

 RSS Feed
